Goods reference book: how the module works
How the “Goods reference book” module works: adding new entries, editing existing ones, disabling and deleting.
Updated
The “Goods reference book” module is meant for compiling the list of goods that can later be used when working with the “Warehouse”.
Contents:
- Opening the module
- What the module does
- Adding
- Editing
- Deleting
- Changing the status
- Merging
- Export
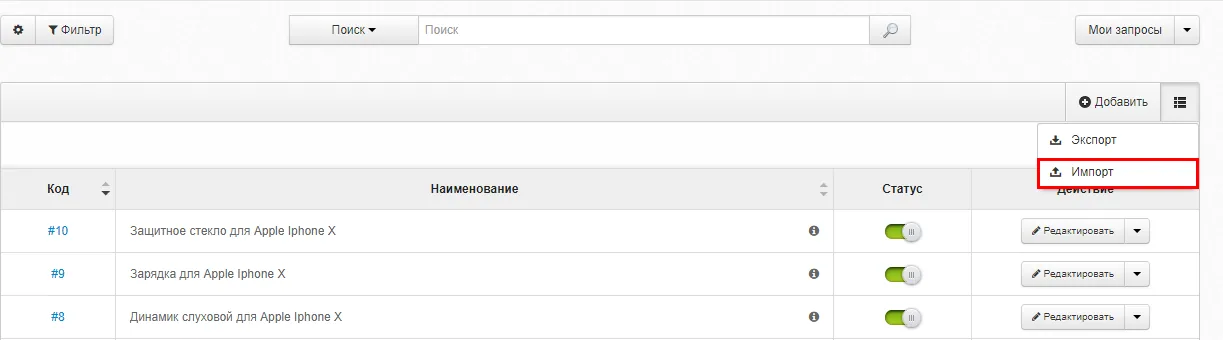
- Import
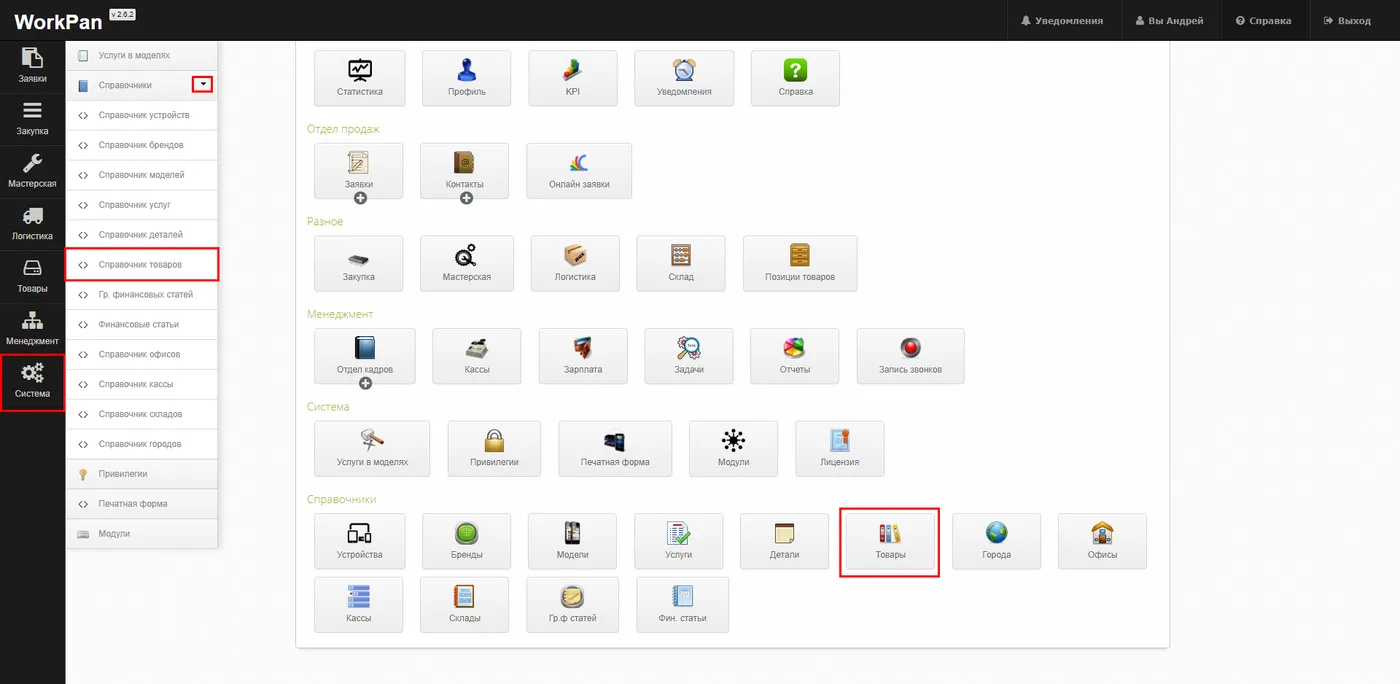
You can reach the “Goods reference book” section:
- Control panel → Goods
- Quick access menu → System → Reference books → Goods reference book
What the module does:
In the “Goods reference book” section you can search the list of goods, add new entries, edit existing ones, change the display status, delete entries you no longer need, merge several entries into one, and also import and export entries.
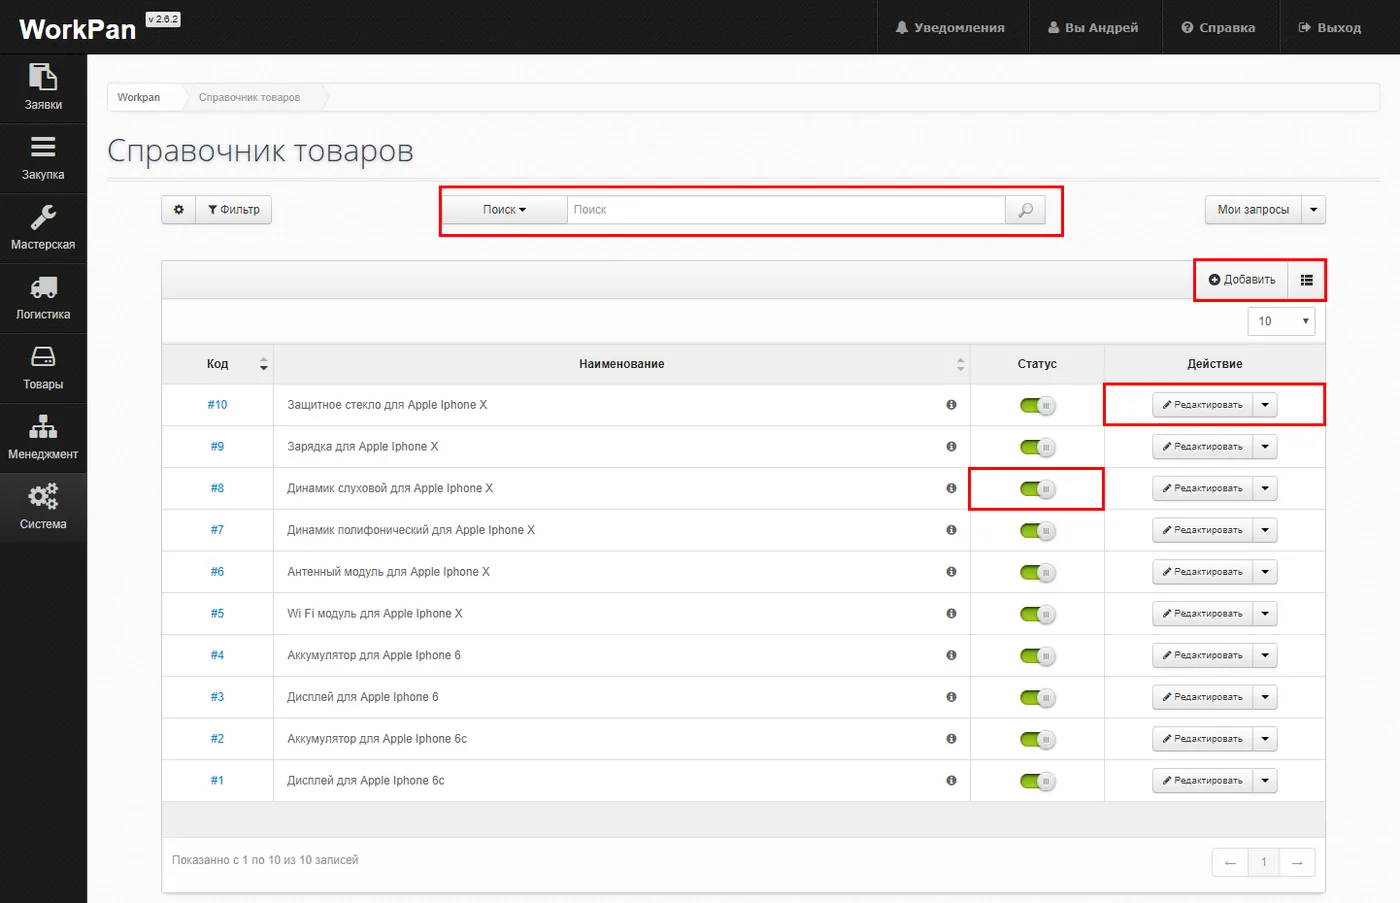
what the module does
We should also note that this reference book is closely linked with the “Parts reference book”, the “Devices reference book”, the “Brands reference book” and the “Models reference book”.
New goods can be added as follows:
Click the “Add” button.

Once you are taken to the corresponding section, you will be asked to fill in a form.
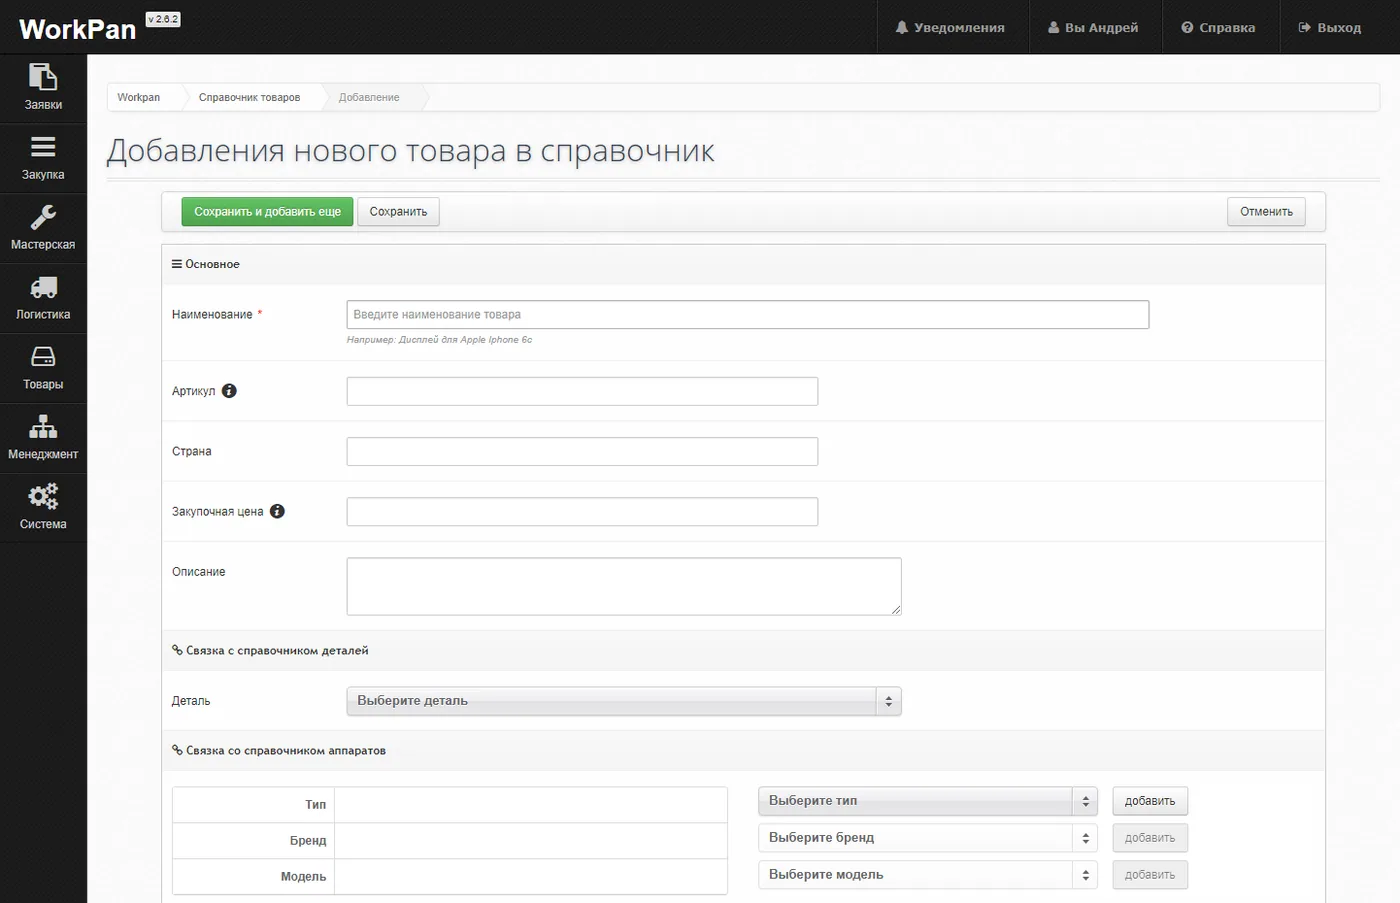
the form for adding new goods to the reference book
The form is split into three categories:
- Main
- Link to the parts reference book
- Link to the devices reference book
In the “Main” category, state:
- The name of the goods
- The article number
- The country of manufacture
- The purchase price
- The description of the goods
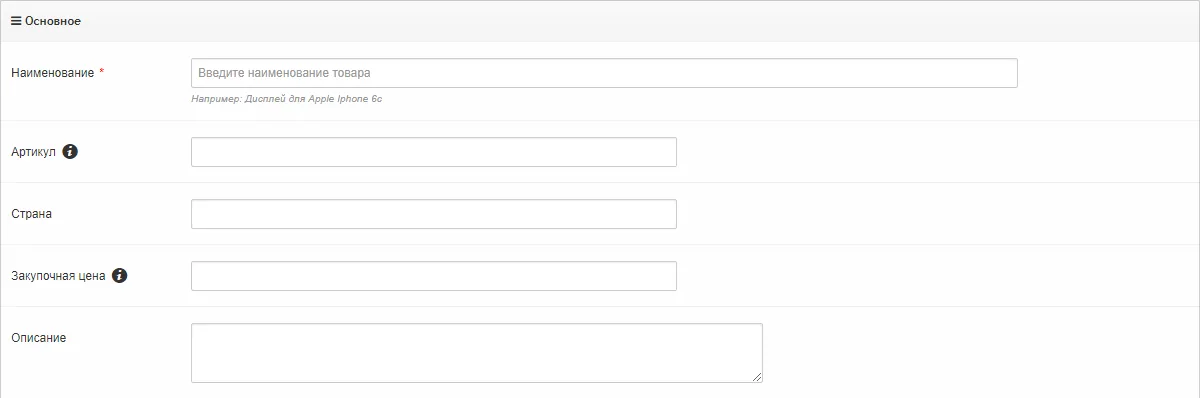
the “Main” category when adding new goods
The “Link to the parts reference book” category:
In this category the entry can be linked to the “Parts reference book”, after which the filter can be used to filter by that field.
To link an entry to the reference book, choose the entry you need from the list.

the “Link to the parts reference book” category
The “Link to the devices reference book” category:
In this category the entry can be linked to the “Devices reference book”, the “Brands reference book” and the “Models reference book”, after which those fields can be used in filtering.
To link an entry to a reference book, choose the entry you need from the list and then click the “Add” button. The added entry moves to the left part of the table, into the corresponding section; to remove a linked entry, click the cross button.
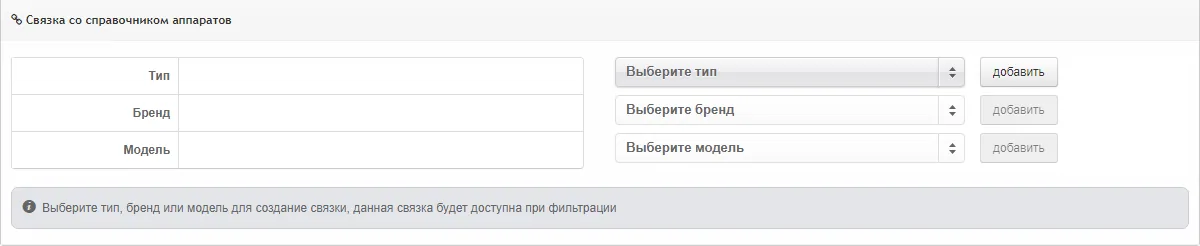
the “Link to the devices reference book” category
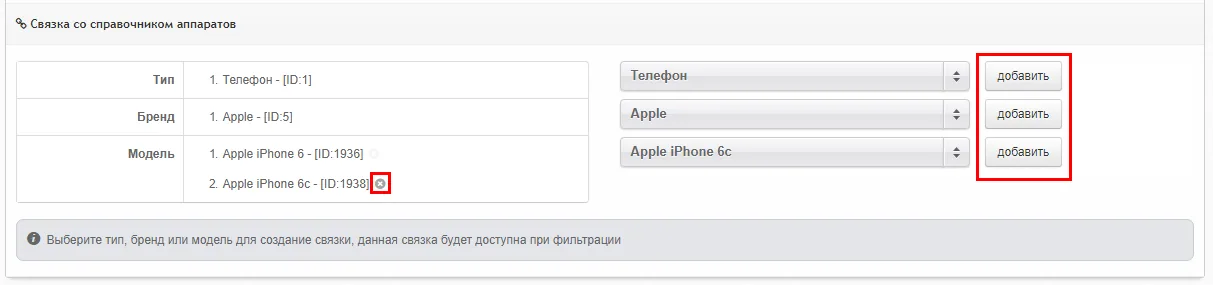
the “Link to the devices reference book” category, adding/removing entries
Once all the data is entered, save the values

To edit an entry in the “Goods reference book”:
- Select the entry you need to edit.
- Click the “Edit” button. You will be taken to the corresponding section with the editing form.
- Then follow the guidance on “Adding new goods”
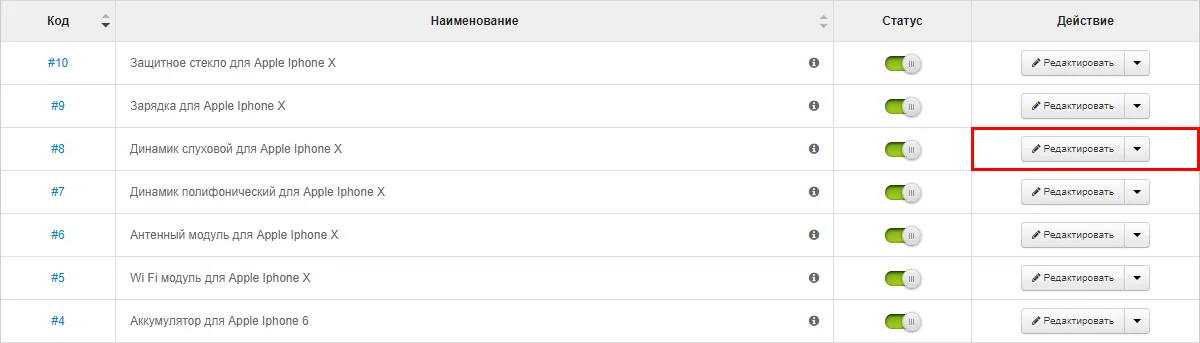
To delete goods from the reference book:
- Select the entry you need to delete.
- Click the drop-down menu next to the “Edit” button. In the field that appears, choose “Delete”.
- Confirm the action in the window that appears: “Yes, delete”.
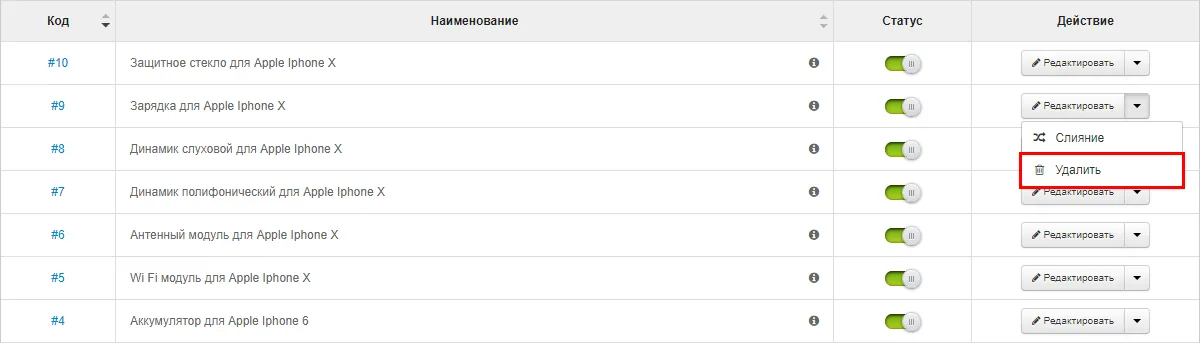
Selecting an entry to delete
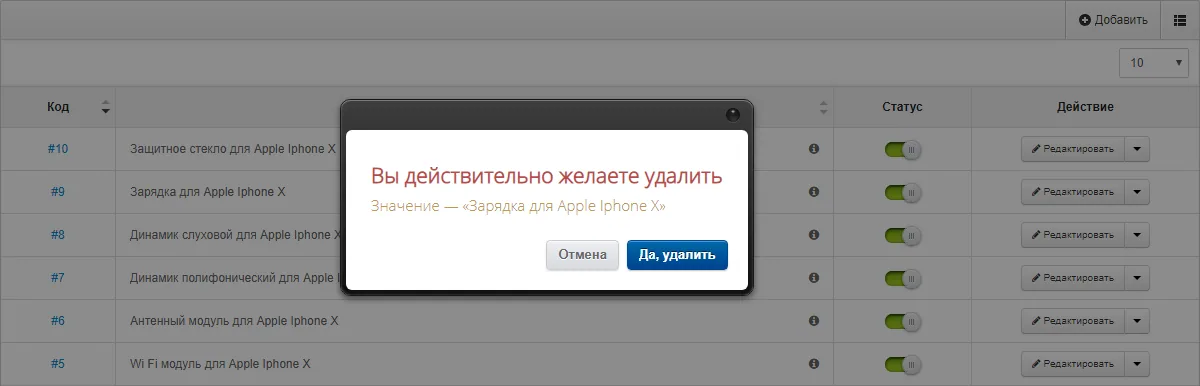
Confirming the deletion of an entry
To switch some goods off temporarily:
- Select the entry you need to switch off.
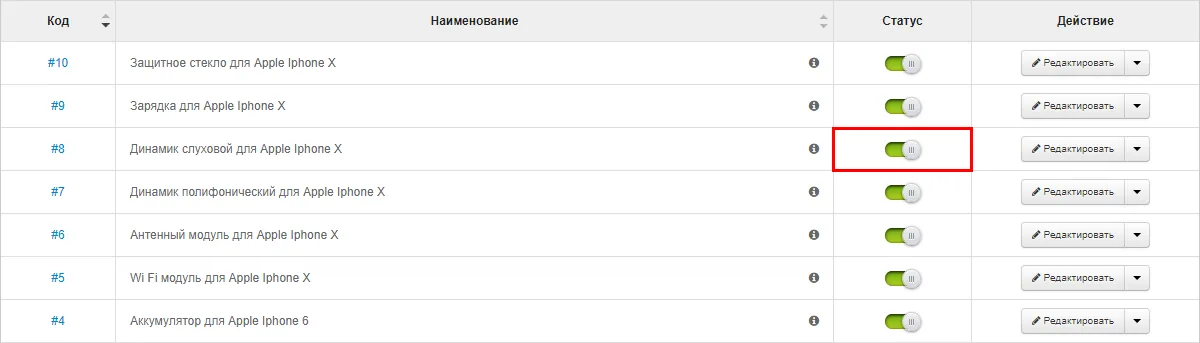
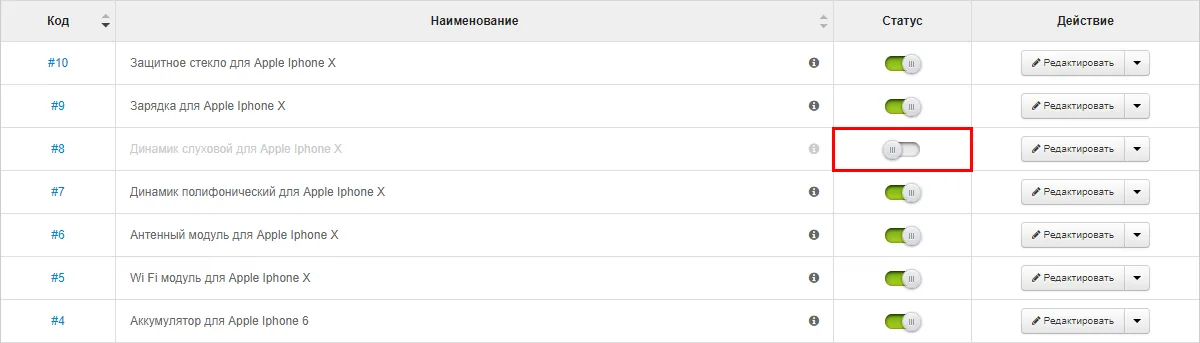
- With the mouse, drag the toggle to the left until the label “Active” changes to “Disabled”. The toggle colour changes from green to grey. Dragging it back to the right activates the disabled entry again.
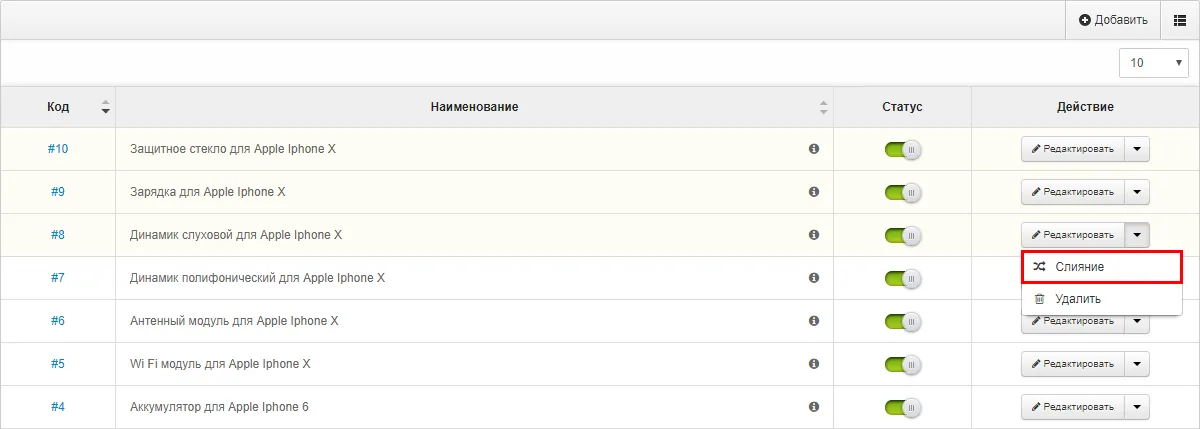
To “merge” several goods into one value:
Attention: be careful — this action cannot be undone. When several entries are merged, all linked reference books and modules are automatically switched to the new value and the old entries are deleted. Use this feature carefully, only for clearly similar/equivalent values.
- For each entry you want to merge, choose “Merge”.
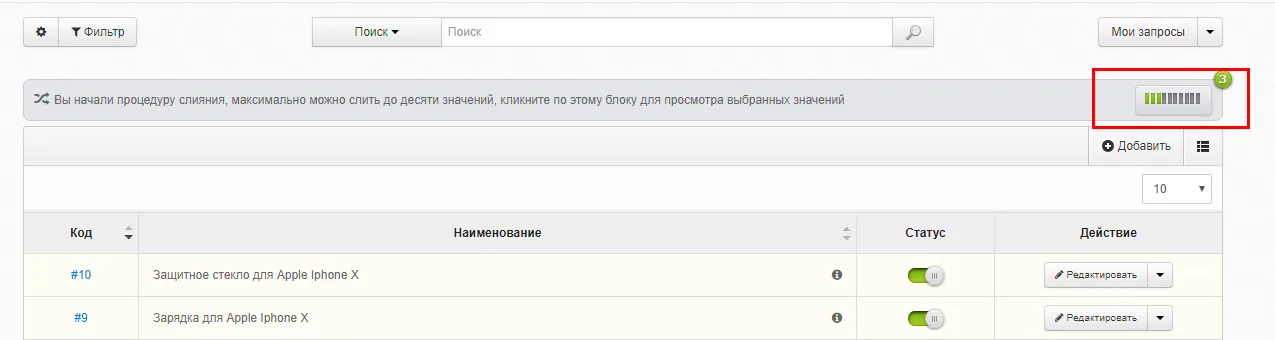
- You can then review the values taking part in the merge.
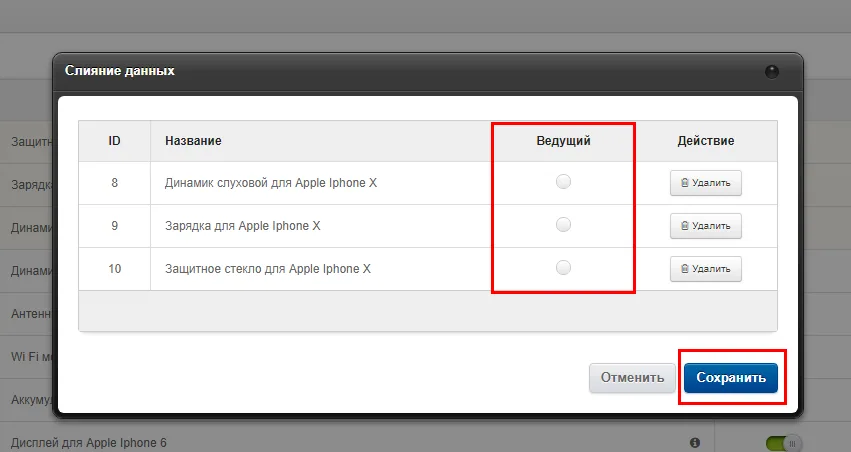
- In the modal window that opens you can remove the values that should not be merged.
- Then choose the “Leading” entry. In every reference book, the remaining entries from the list are replaced with it.
- Click “Save”.
To export goods entries:
- Choose “Export” in the “Actions menu”.
- Then follow the instructions on “Export”
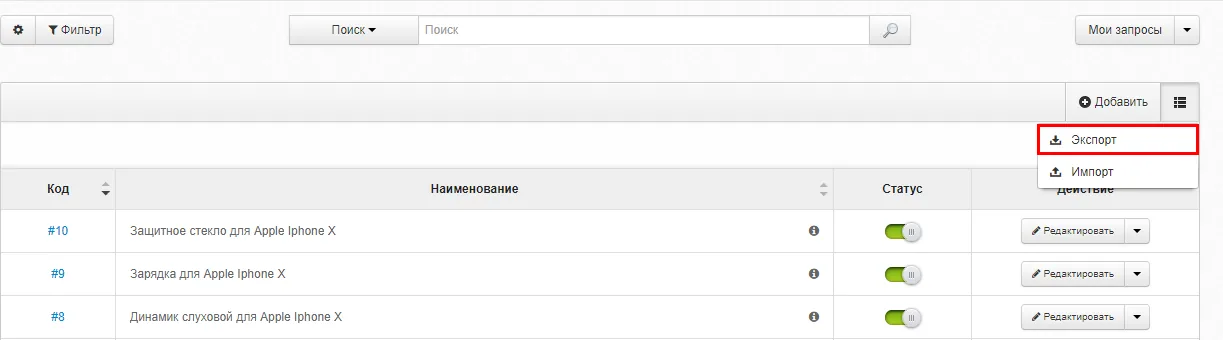
To import goods entries:
- Choose “Import” in the “Actions menu”.
- Then follow the instructions on “Import”