Brands reference book
How to work with the brands reference book. Detailed documentation: viewing, adding, editing, deleting.
Updated
WorkPan comes with a base of brands the user receives together with the program. If needed, however, the user can edit brands, add new ones or delete the ones they do not need, and also link a brand to a particular device category.
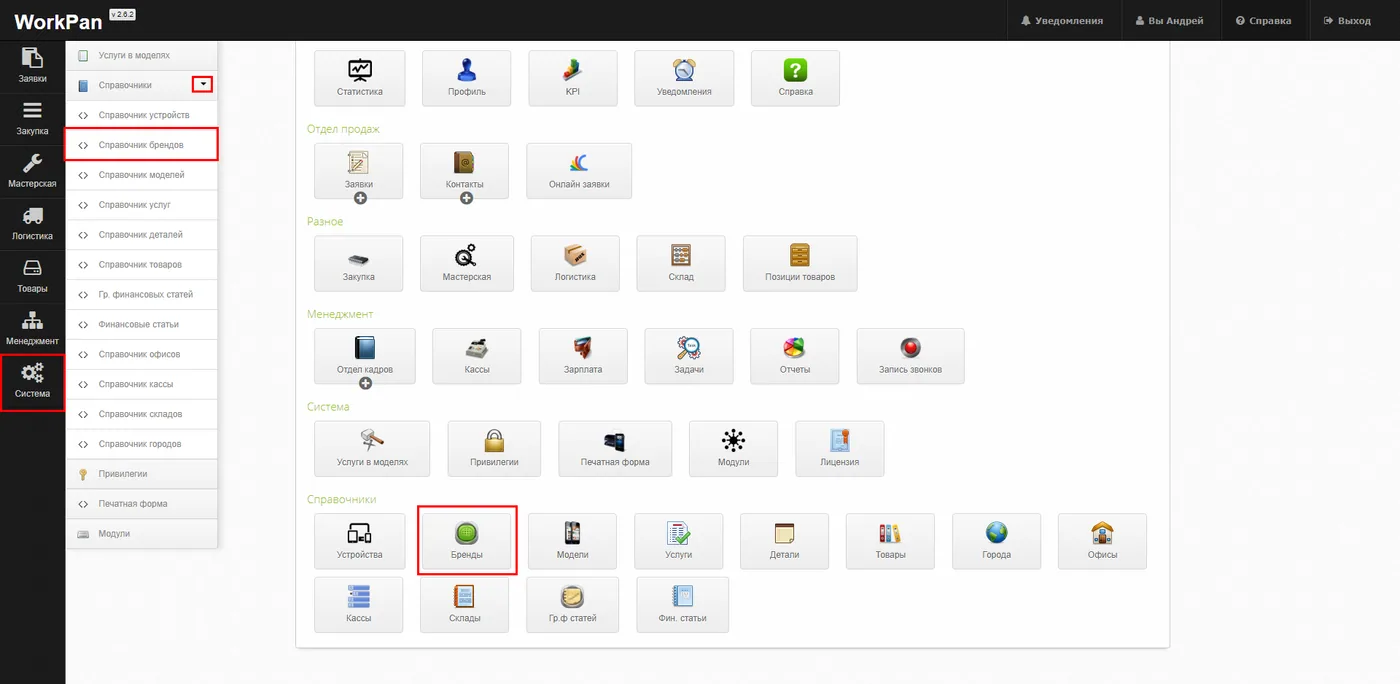
You can reach the Brands reference book section
- Control panel → Brands
- Quick access menu → System → Reference books → Brands reference book
In the Brands reference book section you can search the list of brands, add new ones, delete and edit existing ones. Temporarily switching entries off from the list is available too. You can also choose to show 10, 25, 50 or 100 rows per page.
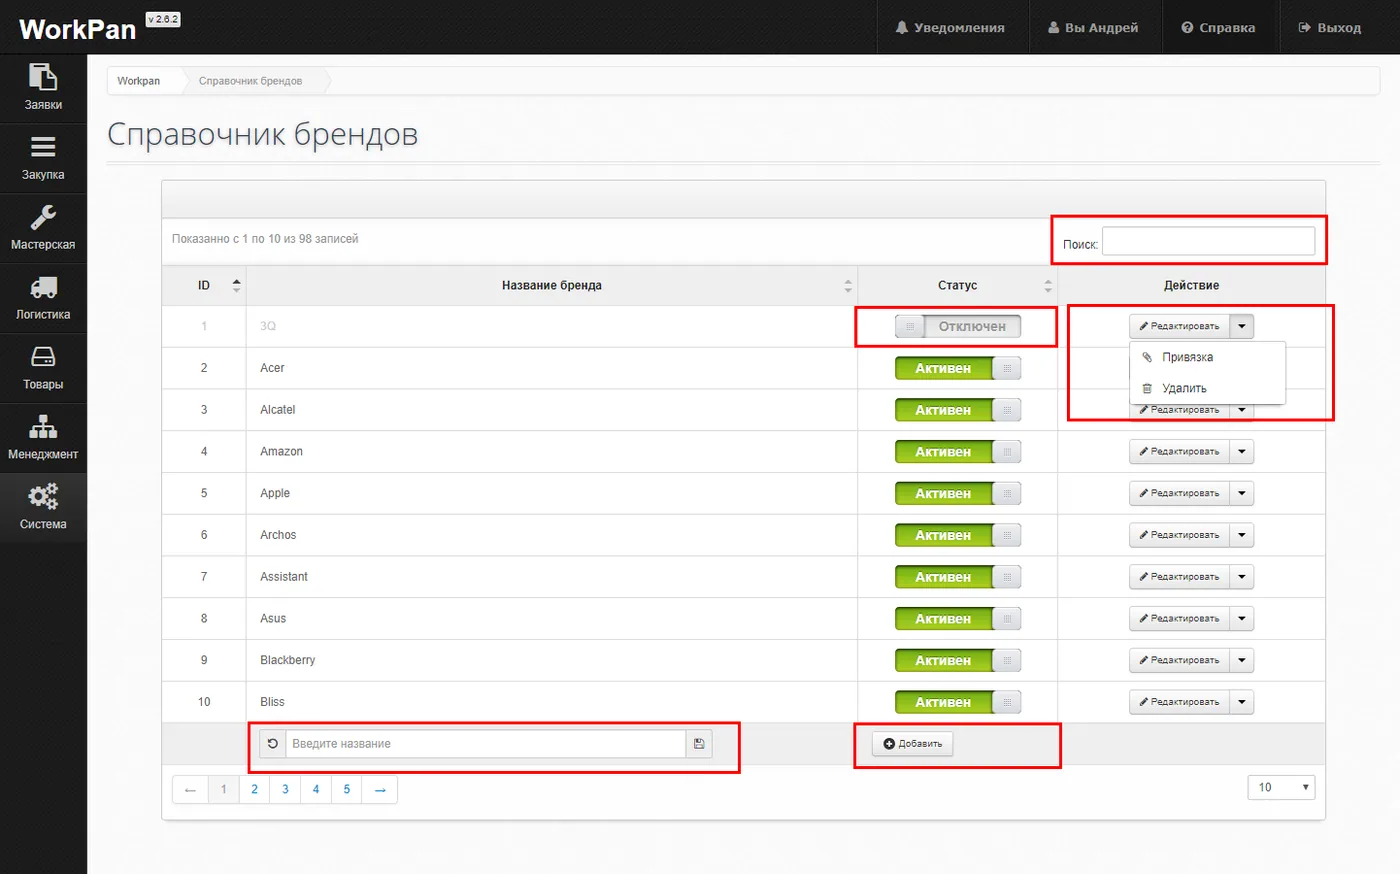
A new brand can be added as follows:
- Click the Add button.
- Enter the brand name in the field that appears.
- Click the floppy-disk icon to the right of the input field, or press Enter on the keyboard, to save.

To edit an existing brand:
- Select the entry you need to edit.
- Click the “Edit” button. The brand name is replaced by a field for entering a new one.
- Type the new name.
- Click the floppy-disk icon to the right of the input field, or press Enter on the keyboard, to save.

To delete a brand from the reference book:
- Select the entry you need to delete.
- Click the drop-down menu next to the “Edit” button. In the field that appears, choose “Delete”.
- Confirm the action in the window that appears: “Yes, delete”.
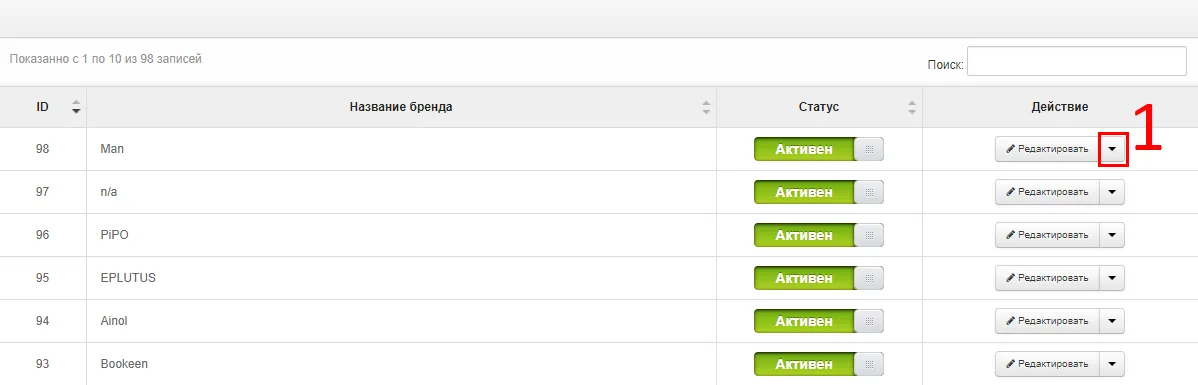
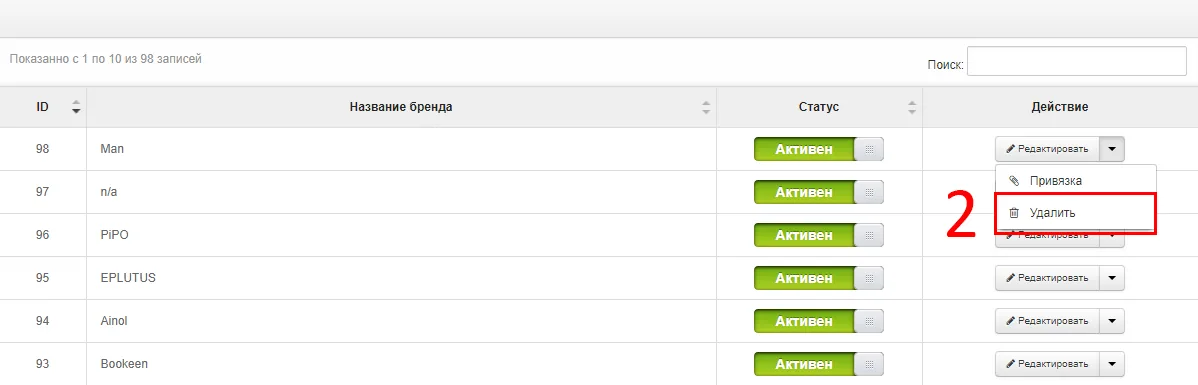
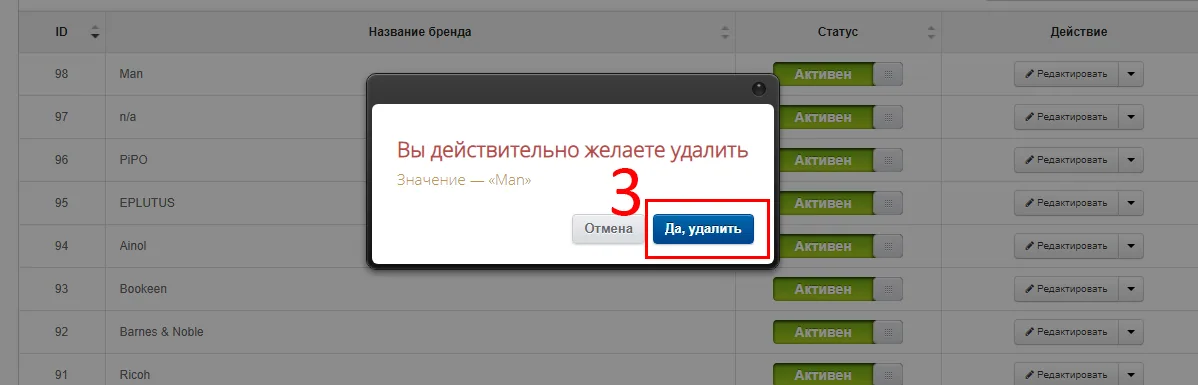
Note: if this “brand” is in use in the system, you will not be able to delete it — only to switch it off (see below)
To switch some brands off temporarily:
- Select the entry you need to switch off.
- With the mouse, drag the toggle to the left until the label “Active” changes to “Disabled”. The toggle colour changes from green to grey. Dragging it back to the right activates the disabled brand again.
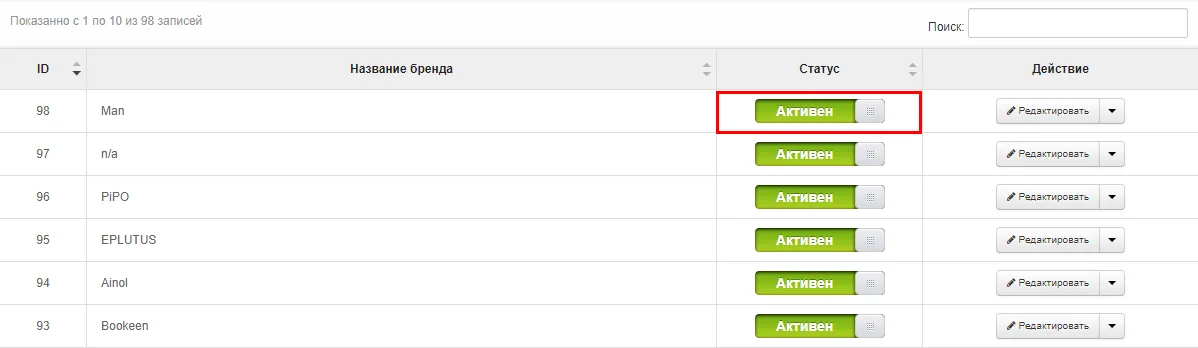
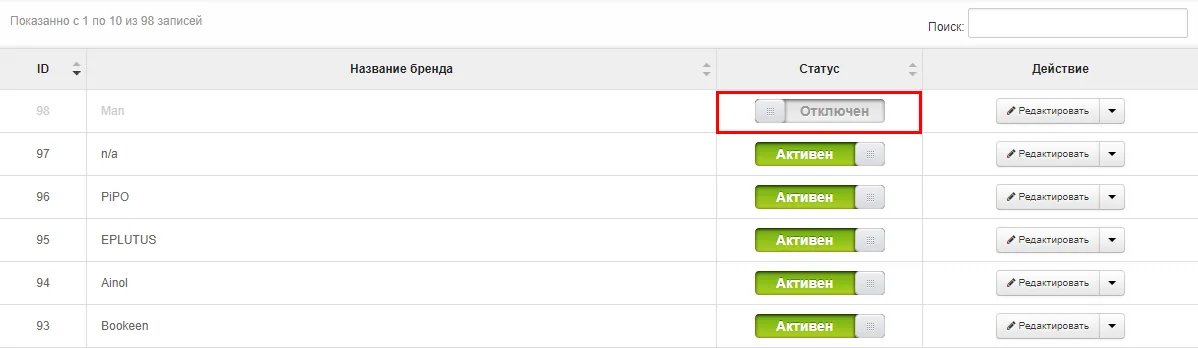
Note: when a brand is disabled in the reference book, all models linked to it become unavailable as well — you will not be able to choose them when creating orders or to use them in other modules.
To link a brand to a device type:
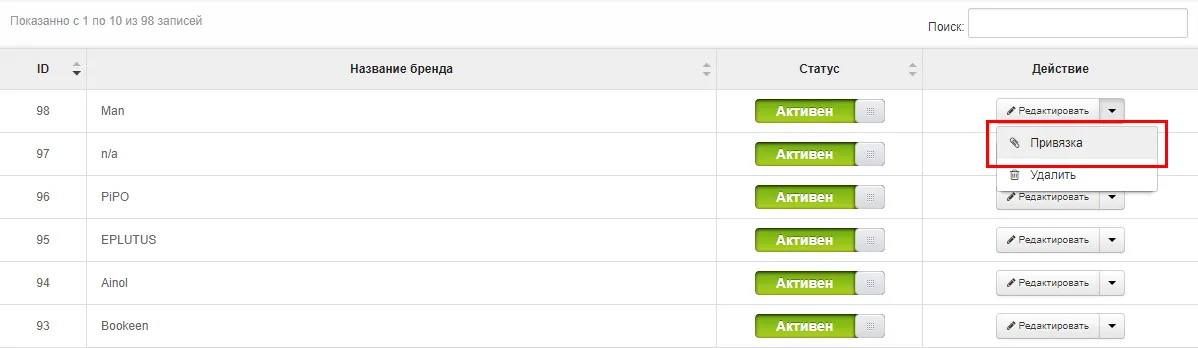
The drop-down menu has a Link function. It is needed so that the system associates a brand with the categories of devices it produces. Later on this comes in handy when adding new devices to the “Models reference book”, and when linking services in the “Services reference book”
- Select the brand you need to link.
- Click the drop-down menu next to the “Edit” button. In the field that appears, choose “Link”.
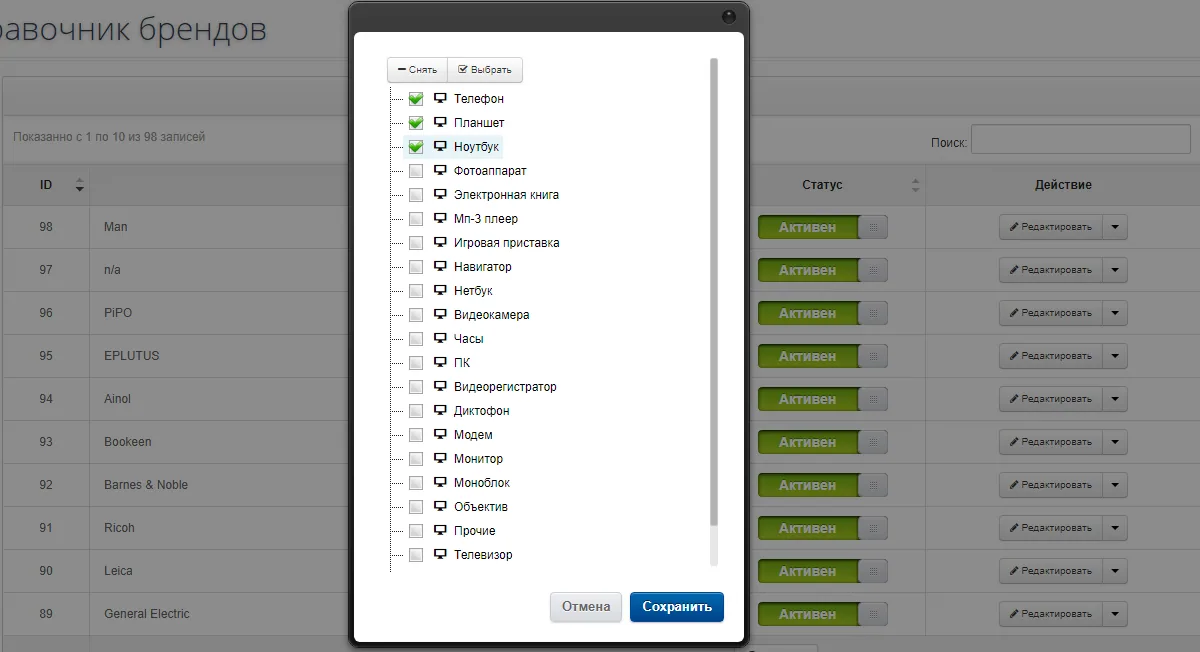
- From the pop-up menu, choose the devices the brand produces. Simply tick the checkboxes to the left of the category names. If the device categories you need are missing, add them in the Devices reference book.
- Click “Save”